Standing Seam Wall Panels A Comprehensive Guide
Standing seam wall panels represent a sophisticated and durable cladding solution for a variety of architectural styles. This guide delves into the manufacturing process, material choices, and installation techniques involved in creating stunning and long-lasting building exteriors. We’ll explore the different panel types, their aesthetic appeal, and the practical considerations for integrating them into your next project, from residential homes to large commercial structures. Get ready to discover why standing seam panels are a top choice for architects and builders alike.
We’ll cover everything from choosing the right materials and profiles to understanding installation best practices and long-term maintenance. By the end, you’ll have a clear understanding of the advantages, considerations, and overall process involved in using standing seam wall panels to elevate your building’s design and longevity.
Introduction to Standing Seam Wall Panels

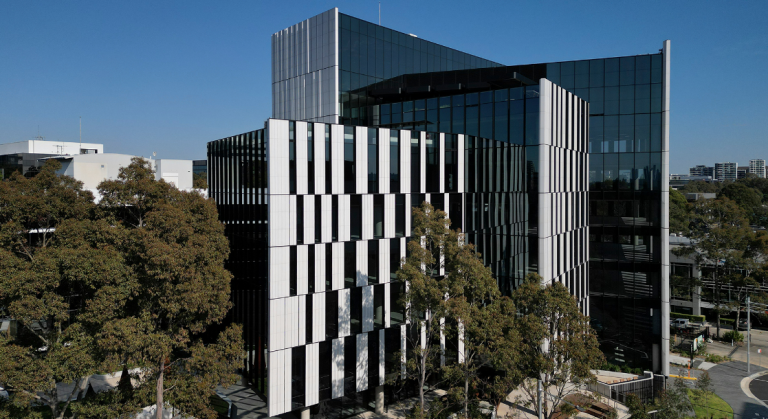
Source: sheetmetalsupplyltd.com
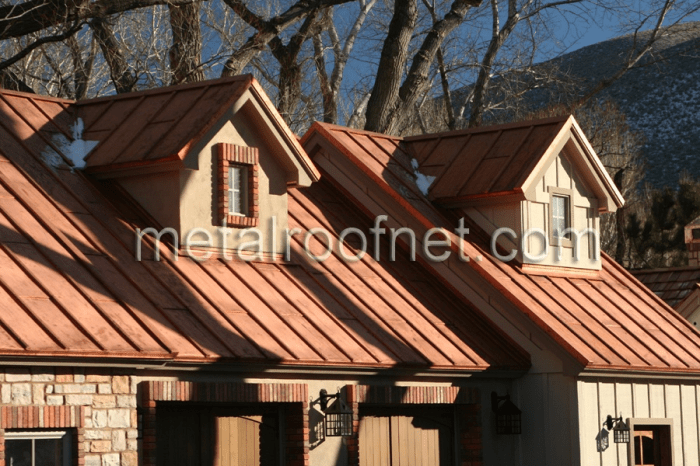
Standing seam wall panels are a popular choice for exterior cladding due to their durability, aesthetic appeal, and ease of installation. They’re known for their distinctive, clean lines and long lifespan, making them a cost-effective solution in the long run. This section will explore the manufacturing process, materials, and advantages of these panels.
Standing Seam Wall Panel Manufacturing
The manufacturing process for standing seam wall panels typically begins with the raw material, usually steel or aluminum coil. This coil is then fed into a roll-forming machine. This machine, through a series of precisely engineered rollers, shapes the flat metal into the desired panel profile. This profile includes the characteristic “standing seam,” a raised seam that interlocks two adjacent panels, creating a weathertight seal. The panels are then cut to the specified length, and often pre-punched with holes for fasteners. Finally, a protective coating, such as paint or a PVDF (polyvinylidene fluoride) finish, is applied to enhance durability and weather resistance. The entire process is highly automated, ensuring consistent quality and precision.
Materials Used in Standing Seam Wall Panel Construction
Standing seam wall panels are commonly constructed from steel or aluminum. Steel panels offer high strength and are often coated with zinc (galvanized steel) or zinc-aluminum alloy (Galvalume) for corrosion resistance. Aluminum panels, on the other hand, are naturally resistant to corrosion and are lighter than steel, making them easier to handle and install. The choice of material depends on factors such as budget, desired lifespan, and the specific environmental conditions. Both steel and aluminum panels can be further enhanced with various coatings to improve aesthetics and durability, including Kynar 500® (a type of PVDF coating), known for its excellent UV resistance and longevity.
Advantages of Standing Seam Wall Panels
Compared to other cladding options, such as traditional siding or corrugated metal, standing seam panels offer several key advantages. Their interlocked seam design provides superior weather resistance, effectively preventing water penetration. This leads to reduced maintenance and a longer lifespan compared to other systems prone to leakage. Furthermore, standing seam panels are generally easy to install, reducing labor costs. Their clean, modern aesthetic enhances the visual appeal of any building, contributing to increased property value. The panels also offer excellent durability, withstanding strong winds and harsh weather conditions, and require minimal upkeep. Finally, they are available in a wide range of colors and finishes, allowing for design flexibility.
Types and Styles of Standing Seam Wall Panels
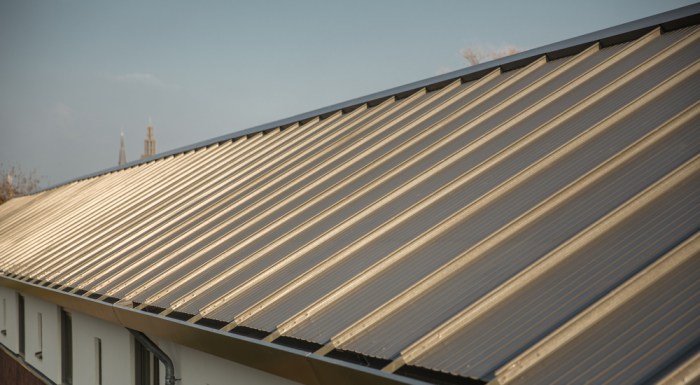
Source: smithbuiltmetals.com
Standing seam wall panels come in a variety of types and styles, offering architects and builders a wide range of options to suit different aesthetic preferences and project requirements. The choice depends on factors like budget, desired durability, and the overall architectural style of the building. Let’s delve into the specifics.
Standing Seam Panel Profiles and Rib Heights
The profile and rib height of a standing seam panel significantly impact its appearance and structural performance. Different profiles create distinct visual effects, ranging from subtle and understated to bold and dramatic. Rib height influences the panel’s strength and resistance to wind uplift. The table below illustrates some common options.
| Material | Profile Name | Typical Rib Height (inches) | Typical Applications |
|---|---|---|---|
| Steel | Ribbed | 1-3 | Industrial buildings, commercial structures, agricultural facilities |
| Aluminum | Batten Seam | 1.5-2.5 | Residential homes, modern commercial buildings, renovations |
| Copper | Reveal Seam | 0.75-1.5 | High-end residential, historical restorations, iconic buildings |
| Steel | Hidden Seam | 1-2 | Contemporary architecture, sleek designs |
Comparison of Panel Materials
Steel, aluminum, and copper are the most common materials for standing seam wall panels. Each offers a unique combination of cost, durability, and aesthetic appeal.
Steel panels are generally the most economical option, offering good strength and durability. However, they require protective coatings to resist corrosion. Aluminum panels are more expensive than steel but offer superior corrosion resistance and lighter weight, making them easier to install. Copper panels are the most expensive, renowned for their exceptional longevity, natural beauty, and inherent corrosion resistance. Their distinctive patina develops over time, adding to their aesthetic appeal. The choice often depends on the project’s budget and desired lifespan. For example, a cost-conscious industrial project might opt for steel, while a high-end residential development might choose copper for its lasting aesthetic value.
Design Considerations for Architectural Styles
Integrating standing seam wall panels into different architectural styles requires careful consideration of the panel’s profile, material, and color. For example, a modern building might utilize sleek, hidden seam aluminum panels in a neutral color, while a traditional building could incorporate a more textured, ribbed steel panel in a darker shade. The choice of material and profile can significantly impact the overall aesthetic. The color of the panels should also complement the building’s design and surroundings. In coastal areas, for instance, lighter colors might be preferred to reflect sunlight and reduce heat absorption. Conversely, darker colors might be suitable for buildings in colder climates. The use of standing seam panels can seamlessly integrate with various architectural styles, from rustic to contemporary.
Installation and Construction of Standing Seam Wall Panels

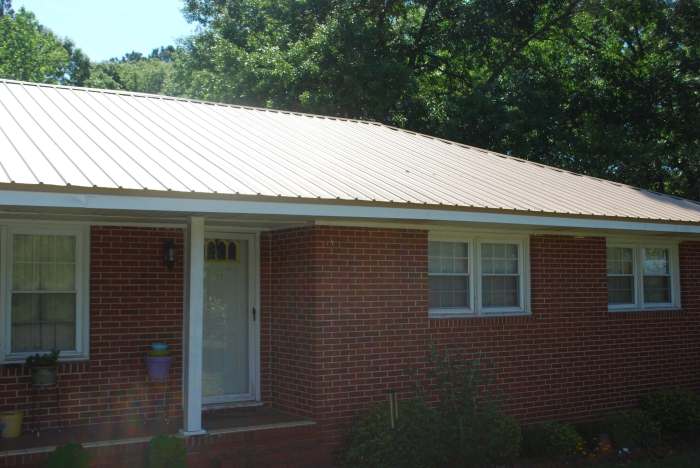
Source: hbksf.com
Installing standing seam wall panels requires precision and attention to detail to ensure a durable, weathertight, and aesthetically pleasing finish. Proper installation techniques are crucial for maximizing the lifespan and performance of the system. This section Artikels a step-by-step guide, including necessary tools and safety precautions, best practices for alignment and sealing, and methods for fastening to various substrates.
Tools and Safety Precautions
Before beginning installation, gather all necessary tools and prioritize safety. Failing to do so can lead to accidents and compromised installation quality.
- Safety glasses, gloves, and appropriate footwear are essential to protect against injuries from sharp edges and falling objects.
- Measuring tapes, levels, chalk lines, and speed squares ensure accurate measurements and alignment.
- Sheet metal shears or snips, and tin snips for cutting panels to size accurately.
- A drill with appropriate drill bits for fastening the panels.
- A sealant gun and appropriate sealant for weatherproofing.
- A crimping tool (often specific to the panel type) for securing the seams.
- Safety harnesses and fall protection equipment are crucial when working at heights.
Panel Alignment and Watertight Seals
Maintaining proper panel alignment and creating watertight seals are paramount to prevent leaks and ensure the long-term performance of the standing seam wall system.
Accurate panel alignment is achieved through careful measuring and the use of a level at each stage of installation. Slight misalignments can accumulate, leading to significant problems. Overlapping panels should be consistently aligned to create a uniform, visually appealing finish. Proper seam alignment and crimping are critical to ensure a watertight seal. Crimping tools should be used to create a strong, tight seam that prevents water penetration. Using a quality sealant at panel overlaps and penetrations adds an extra layer of protection.
Fastening Methods for Various Substrates
The method of fastening standing seam panels varies depending on the substrate (the underlying material). Choosing the incorrect fastening method can lead to panel failure and water damage.
For wood framing, concealed fasteners are typically used. These are hidden behind the panels, maintaining the aesthetic appeal. For steel or concrete substrates, mechanical fasteners may be necessary, which are attached directly to the substrate. The choice of fastener depends on the specific panel and substrate materials. The proper fastener length is crucial to prevent penetration through the panel and ensure secure attachment. Over-tightening can damage the panels. Proper sealant application around fasteners prevents water intrusion.
Examples of fastener types include self-tapping screws, rivets, and clips. Each fastener type requires specific installation techniques to ensure proper performance and longevity.
Step-by-Step Installation Guide
A detailed, step-by-step guide is essential for successful installation.
- Prepare the substrate: Ensure the substrate is clean, level, and free from debris.
- Install the starting trim: This provides a base for the first panel and ensures proper alignment.
- Install the first panel: Secure the panel to the substrate using appropriate fasteners.
- Install subsequent panels: Overlap each panel according to the manufacturer’s instructions, ensuring proper alignment and crimping of the seams.
- Seal all joints and penetrations: Apply sealant to prevent water intrusion.
- Install end trim: This completes the installation and provides a finished look.
- Inspect the completed installation: Check for any gaps, misalignments, or other defects.
Maintenance and Durability of Standing Seam Wall Panels

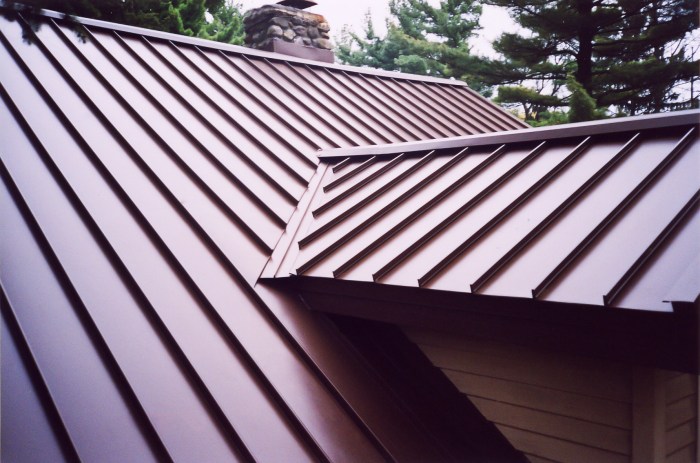
Source: abedward.com
Standing seam metal wall panels, when properly installed and maintained, offer exceptional longevity and require minimal upkeep. However, understanding the factors influencing their lifespan and implementing a proactive maintenance plan is key to maximizing their performance and aesthetic appeal over the years. Regular inspections and cleaning prevent minor issues from escalating into costly repairs.
Maintenance Schedule for Standing Seam Wall Panels
A regular maintenance schedule will significantly extend the life of your standing seam wall panels. This schedule should incorporate both routine inspections and cleaning procedures, performed at different intervals depending on the environmental conditions.
- Annual Inspection: A thorough visual inspection should be conducted annually. This involves checking for signs of corrosion, dents, scratches, loose fasteners, or sealant failure. Pay close attention to areas prone to water accumulation, such as seams and flashing. Document any findings for future reference.
- Bi-Annual Cleaning: At least twice a year, gently clean the panels using a soft brush, mild detergent, and water. Avoid abrasive cleaners or high-pressure washers, which can damage the panel’s protective coating. Rinse thoroughly and allow to air dry completely. Consider using a telescoping brush for high-reach areas.
- Immediate Attention to Damage: Any damage, no matter how minor, should be addressed promptly. Ignoring small issues can lead to larger, more expensive problems down the line. Repairing a small dent or replacing a damaged panel is far more cost-effective than dealing with extensive corrosion or water damage.
Factors Affecting the Longevity of Standing Seam Wall Panels
Several factors contribute to the overall lifespan of standing seam wall panels. Understanding these factors allows for informed material selection and proactive maintenance strategies.
- Material Selection: The type of metal used significantly impacts durability. Aluminum, steel, and zinc are common choices, each with varying corrosion resistance and lifespan. Aluminum offers excellent corrosion resistance, while steel requires protective coatings like Galvalume or zinc to prevent rust. Zinc is highly corrosion-resistant, particularly in marine environments. The gauge (thickness) of the metal also plays a crucial role; thicker panels are more resistant to damage.
- Environmental Conditions: Exposure to harsh weather conditions, such as extreme temperatures, heavy snowfall, and coastal salt spray, accelerates the deterioration of the panels. Coastal areas often require more frequent inspections and cleaning due to the corrosive effects of salt. Areas with significant temperature fluctuations may experience increased expansion and contraction, potentially leading to sealant failure.
- Installation Quality: Proper installation is paramount for long-term performance. Improperly installed panels are more susceptible to leaks, corrosion, and premature failure. Ensuring the installer has experience with standing seam panels and adheres to manufacturer’s specifications is crucial.
Potential Issues and Their Solutions
Despite their durability, standing seam panels can encounter certain issues over time. Addressing these problems promptly minimizes potential damage and cost.
- Corrosion: Corrosion, typically manifesting as rust or pitting, is a common issue, especially with steel panels lacking adequate protective coatings. Addressing corrosion requires prompt action, often involving cleaning the affected area, applying a rust inhibitor, and potentially replacing severely damaged sections.
- Leaks: Leaks usually originate from damaged seams, faulty flashing, or improper sealant application. Identifying the leak source requires careful inspection, often involving checking seams, flashing, and panel edges. Repair typically involves resealing, replacing damaged components, or applying additional sealant.
- Dents and Scratches: Minor dents and scratches are common, particularly in high-traffic areas. Small dents may be repairable through careful manipulation. Larger dents or deep scratches may require panel replacement.
Cost and Budgeting for Standing Seam Wall Panels
Source: utahmetalroofs.com
Planning the budget for a standing seam metal wall panel project requires careful consideration of several factors. The total cost will vary significantly depending on project size, material choices, and regional labor rates. Understanding these variables is crucial for accurate budgeting and avoiding cost overruns.
Accurate cost estimation is key to successful project management. A detailed breakdown of expenses allows for informed decision-making and prevents unexpected financial burdens. This section will guide you through the process of creating a realistic budget.
Cost Breakdown for Standing Seam Wall Panel Installation, Standing seam wall panels
The following table provides a sample cost breakdown for a typical standing seam wall panel installation project. Remember that these are estimates, and actual costs may vary based on your specific project requirements and location.
| Cost Category | Description | Estimated Cost per Square Foot | Total Estimated Cost (Example: 1000 sq ft project) |
|---|---|---|---|
| Materials | Panels, fasteners, flashings, sealants, and underlayment | $8 – $15 | $8,000 – $15,000 |
| Labor | Installation, site preparation, and cleanup | $5 – $12 | $5,000 – $12,000 |
| Permits | Building permits, inspections | $1 – $3 | $1,000 – $3,000 |
| Contingency | Unexpected costs, material waste, etc. | $2 – $5 | $2,000 – $5,000 |
| Total | $16 – $35 | $16,000 – $35,000 |
Note: These figures are estimates and can vary widely depending on location, project complexity, and material choices. Always obtain multiple quotes from reputable contractors.
Factors Influencing Overall Project Cost
Several factors can significantly impact the final cost of your standing seam wall panel project. Understanding these variables will help you make informed decisions and manage your budget effectively.
These factors include:
- Project Size: Larger projects generally have lower per-square-foot costs due to economies of scale.
- Material Selection: Higher-quality materials, such as those with thicker gauge metal or specialized finishes, will increase the cost.
- Panel Style and Design: Complex designs or custom features will add to the overall expense.
- Labor Costs: Regional labor rates, contractor experience, and project complexity influence labor costs.
- Site Conditions: Difficult terrain, access limitations, or existing structural issues can increase installation time and cost.
- Permits and Inspections: Permitting fees and inspection costs vary by location and project scope.
Creating a Realistic Budget
Developing a realistic budget involves a multi-step process that ensures you account for all potential expenses. Accurate budgeting minimizes financial surprises and contributes to a smooth project execution.
Steps to create a realistic budget:
- Determine Square Footage: Accurately measure the area to be covered with wall panels.
- Gather Material Quotes: Obtain quotes from multiple suppliers for the chosen panel type, color, and gauge.
- Obtain Labor Estimates: Secure bids from at least three reputable contractors, comparing their experience and proposed timelines.
- Factor in Permits and Inspections: Research permit costs and inspection fees in your area.
- Include a Contingency: Allocate a percentage (typically 10-20%) for unforeseen expenses.
- Total All Costs: Sum up all estimated costs to determine the total project budget.
Visual Representation of Standing Seam Wall Panels
Source: com.au
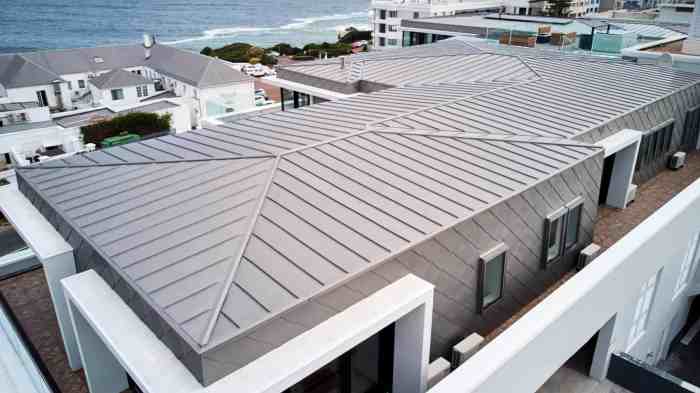
Standing seam wall panels offer a striking visual impact, significantly influencing a building’s aesthetic appeal. Their clean lines and customizable options allow for diverse applications across various architectural styles. The following examples illustrate how panel color, profile, and finish interact with different building types and lighting conditions.
Standing Seam Applications on Different Building Types
The versatility of standing seam panels is evident in their adaptability to residential, commercial, and industrial structures. Consider these examples:
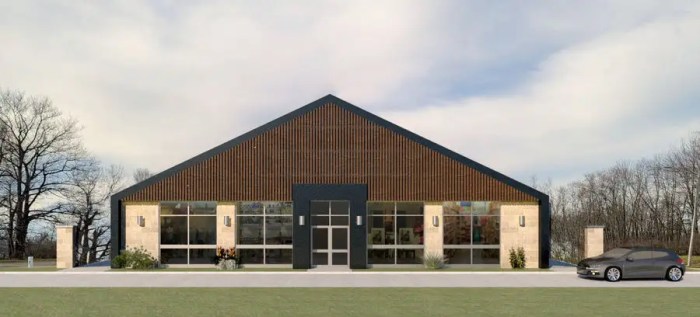
- Residential Application: Imagine a modern farmhouse with walls clad in a dark charcoal grey standing seam panel, featuring a low-profile rib. The matte finish subtly reflects sunlight, creating a sophisticated and understated look that complements the rustic charm of the house. The deep color provides a strong contrast against lighter-colored trim and windows, enhancing the home’s architectural details. The low profile maintains a clean, uncluttered appearance, suitable for a contemporary design aesthetic.
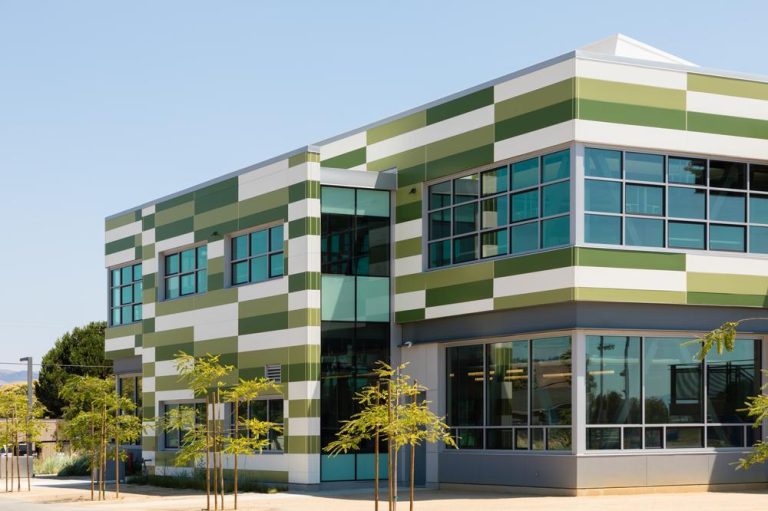
- Commercial Application: A sleek, contemporary office building could utilize a vibrant, metallic silver standing seam panel with a medium rib profile. The reflective quality of the silver enhances the building’s modern feel, especially under sunlight, reflecting the surrounding cityscape. The medium rib adds texture and visual interest without overwhelming the building’s clean lines. The metallic finish contributes to a professional and high-tech image, fitting for a commercial space.
- Industrial Application: A large warehouse or factory might use a durable, dark brown standing seam panel with a high rib profile. The deep brown provides a sense of stability and practicality, appropriate for an industrial setting. The high rib adds significant texture and strength to the building’s exterior. The panels’ resilience to harsh weather conditions and potential impacts makes them a suitable choice for this application, reflecting the building’s functionality.
Visual Texture and Appearance Under Different Lighting Conditions
The visual impact of standing seam panels changes dramatically depending on the lighting.
In direct sunlight, the panels’ color and finish become highly pronounced. Metallic finishes will reflect light intensely, creating a shimmering effect. Matte finishes will show subtle variations in tone and texture. Darker colors may absorb more heat, potentially affecting the building’s energy efficiency. In shaded areas, the panels will appear darker and less reflective, showcasing the texture of the panel profile more clearly. The contrast between sunlit and shaded areas can create dynamic visual interest. Under artificial light, the panels’ color will appear slightly muted, with the texture and profile remaining the defining visual elements. The color accuracy might vary depending on the type of artificial light used.
Effect of Different Panel Colors and Finishes
Panel color and finish are crucial design considerations.
Light colors, such as whites and creams, reflect sunlight, reducing heat absorption and potentially lowering energy costs. They create a bright and airy feel, suitable for buildings where openness and spaciousness are desired. Darker colors, such as browns and greys, absorb more sunlight, potentially increasing heat absorption. They can create a more dramatic and imposing visual effect, suitable for buildings where a strong, commanding presence is desired. Metallic finishes offer a contemporary, high-tech look, reflecting light and creating a dynamic appearance. Matte finishes provide a more subtle and understated aesthetic, allowing the texture and profile of the panels to take center stage. The choice of color and finish will significantly influence the building’s overall aesthetic and how it interacts with its environment.
Epilogue

Source: squarespace.com
Standing seam wall panels offer a compelling blend of aesthetics, durability, and longevity, making them an ideal choice for diverse building projects. From the initial design phase to long-term maintenance, understanding the various aspects discussed – material selection, installation techniques, and cost considerations – is key to a successful outcome. By carefully weighing the benefits and potential challenges, you can confidently incorporate these panels into your next project, ensuring a beautiful and resilient exterior for years to come. Remember to consult with professionals for specific project needs and to ensure adherence to building codes.